Thu Jan 07 2021
Integrating Continuous Deployment to Gatsby
Learn how to intergrate Continuous Deployment to Gatsby projects using GitHub and Netlify to make pushing new features easier and faster
A few weeks back I wrote a blog post on how you can easily deploy a React app using Netlify. I also made a video on it and uploaded it to YouTube if you prefer learning by watching when compared to reading a blog post. Today’s blog post can be considered somewhat an extension of this as I will be explaining how you can use continuous deployment in order to push any features that have been tested and given the green light from staging to the production environment. The framework I will be using for this is Gatsby as it now my preferred way to make static sites (this should also work on React as Gatsby is built on React).
So, before we begin there are 3 things that we need.
A Gatsby Project
A GitHub Account in order to use GitHub Desktop (I use GitHub desktop as it provides a nice graphical user interface (GUI) for me to work with, instead of typing the usual Git commands)
A Netlify Account
Once you have the above, we move onto step now 1.
Step 1. Adding our local Gatsby project to GitHub
In order to add our local Gatsby files to GitHub, I use GitHub Desktop which you can download here. Download the version that matches your OS and log into it with you GitHub Login details Once you do you will see the UI of the GitHub Desktop and all you have to do to add your local Gatsby files to GitHub is to choose File from the bar at the top and select the Add Local Repository option. Once you do that, select the path where your Gatsby folder is located and click the blue publish repository button you see in the below image.
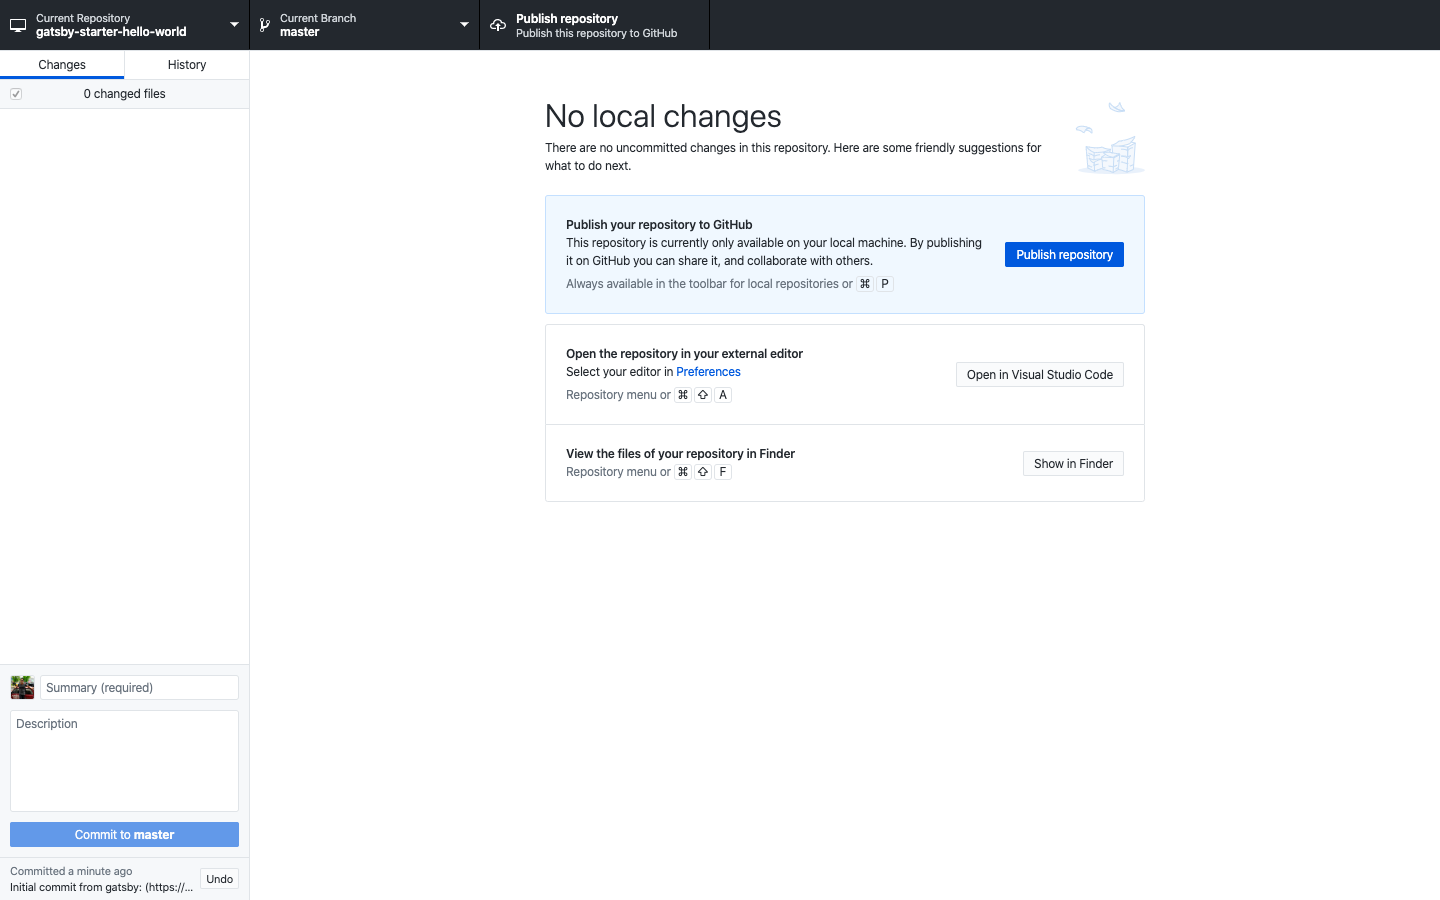
Alright! Once you have done that, we have added our project to GitHub. The next step is to connect our Master branch for this project from GitHub with Netlify. This will allow Netlify to use our Master branch from GitHub to deploy it.
Step 2. Connecting GitHub to Netlify
If you haven’t got a Netlify account, you can easily do it by going over to their website. I recommend signing up with your GitHub account for this as it will make your life easier in the long run. Once you this completed, head over to this page in order to deploy your Gatsby project that is now on GitHub. From this page choose GitHub as it is Git provider where your site’s source code is hosted. Once you choose it, Netlify might ask you to log in to GitHub but that’s just for verification purposes. After all, this is done you will be taken to a page such as the one you see below
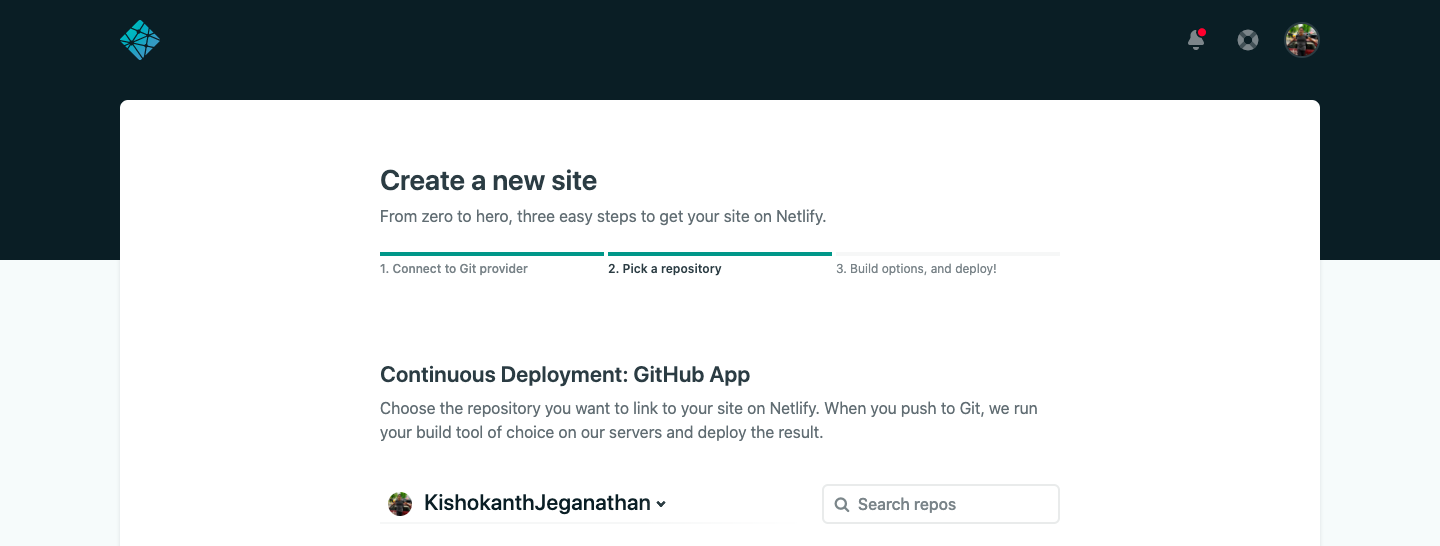
Go to the search repos search bar and type in the name of the project you used when you were uploading your Gatsby folder to GitHub from step 1. When you insert this name and press enter, you will see your repository. Once you click on it, you will see a screen similar to the one below.
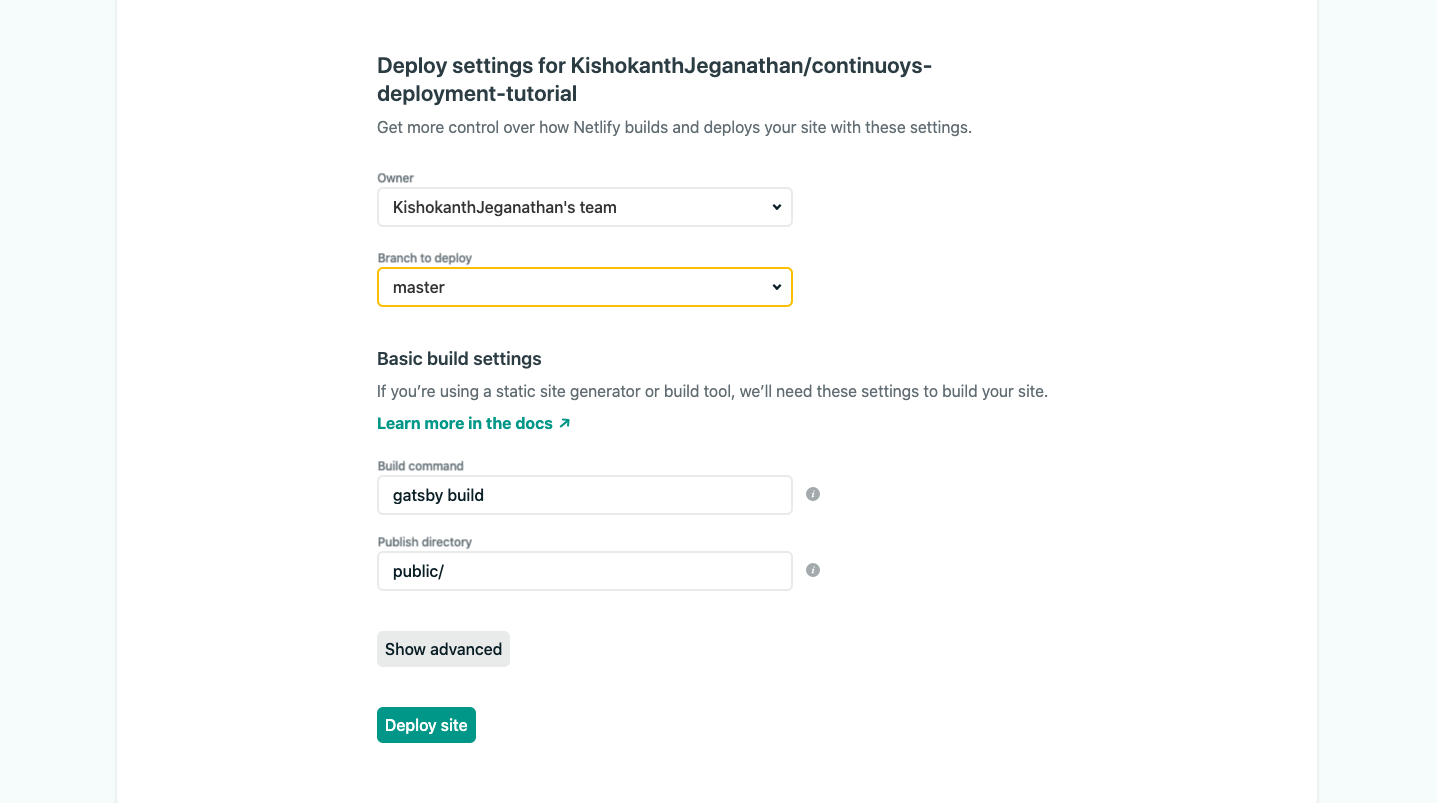
Make sure the branch to deploy has Master in it, as it is our Master branch that Netlify needs to look at and deploy.
Once the above is done you will be taken to a Netlify page such as the one below, informing you that your site is now being deployed
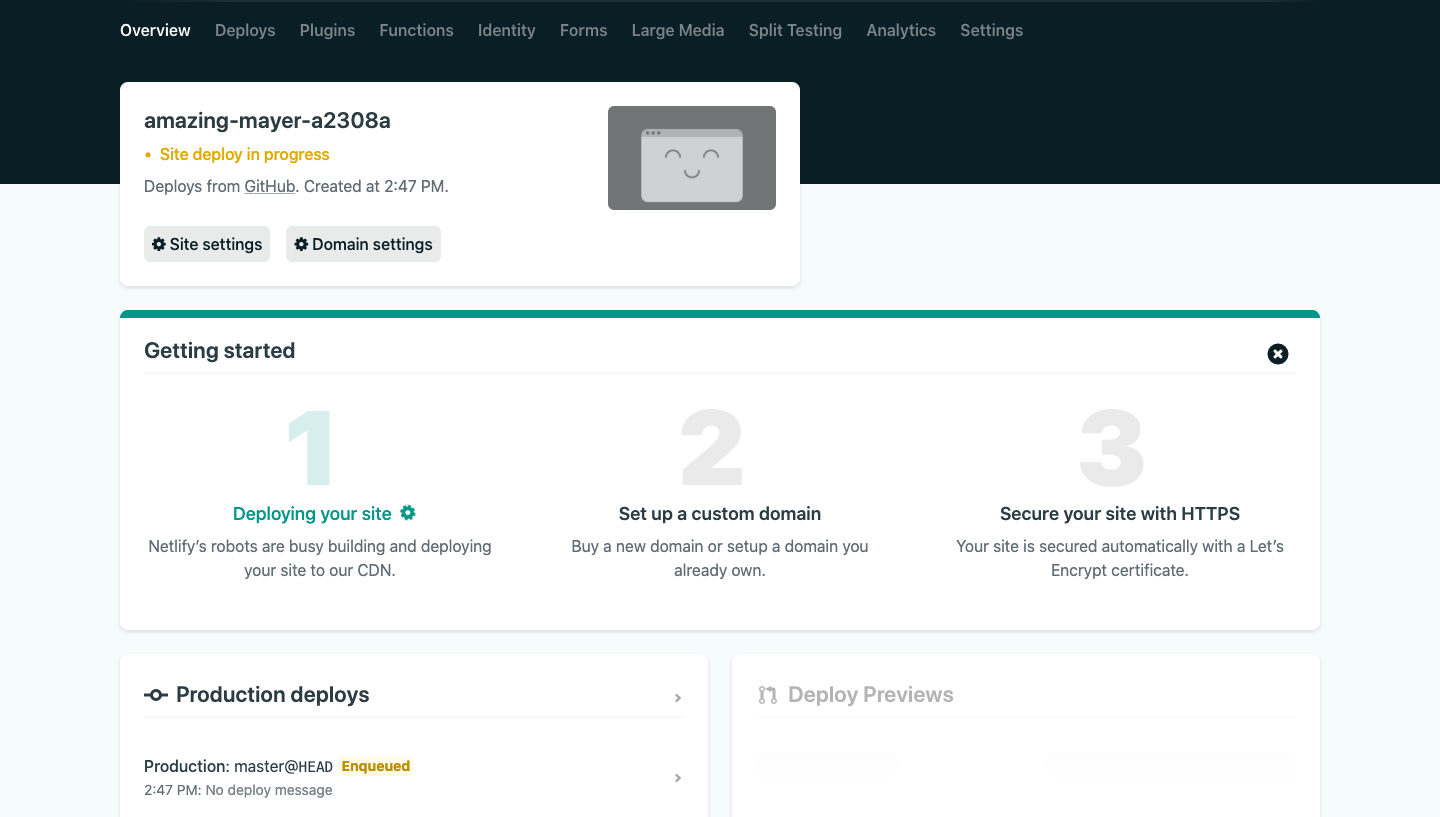
When the deployment is complete, you will see a weird looking link such as this- https://amazing-mayer-a2308a.netlify.app. Your link will be different but this is the URL in which Netlify has deployed your Gatsby project (you can, of course, change this URL to one of your choice if you have a domain name of your own) and we can produce that this is now the production site.
Once all of this is done, you can pat yourself on the back for completing the 2 most important steps involved in using continuous deployment with Gatsby! 🎉 💪
Step 3- Using continuous deployment to push features to production from the staging environment
Now that we have connected our master branch to Netlify, Netlify will be notified of any change in the master branch so that it can trigger another deployment with the latest code.
So, anytime you want to add a new feature to your Gatsby project, create a new branch from the master and add the necessary code into that. Once you are finished with coding this new feature, test it. Poke around and see if the feature works as it should because the last thing you want is buggy code.
Does the feature you just worked on in a new branch work as it should? Perfect! Now we have to commit our changes in the new branch to that branch as you see below
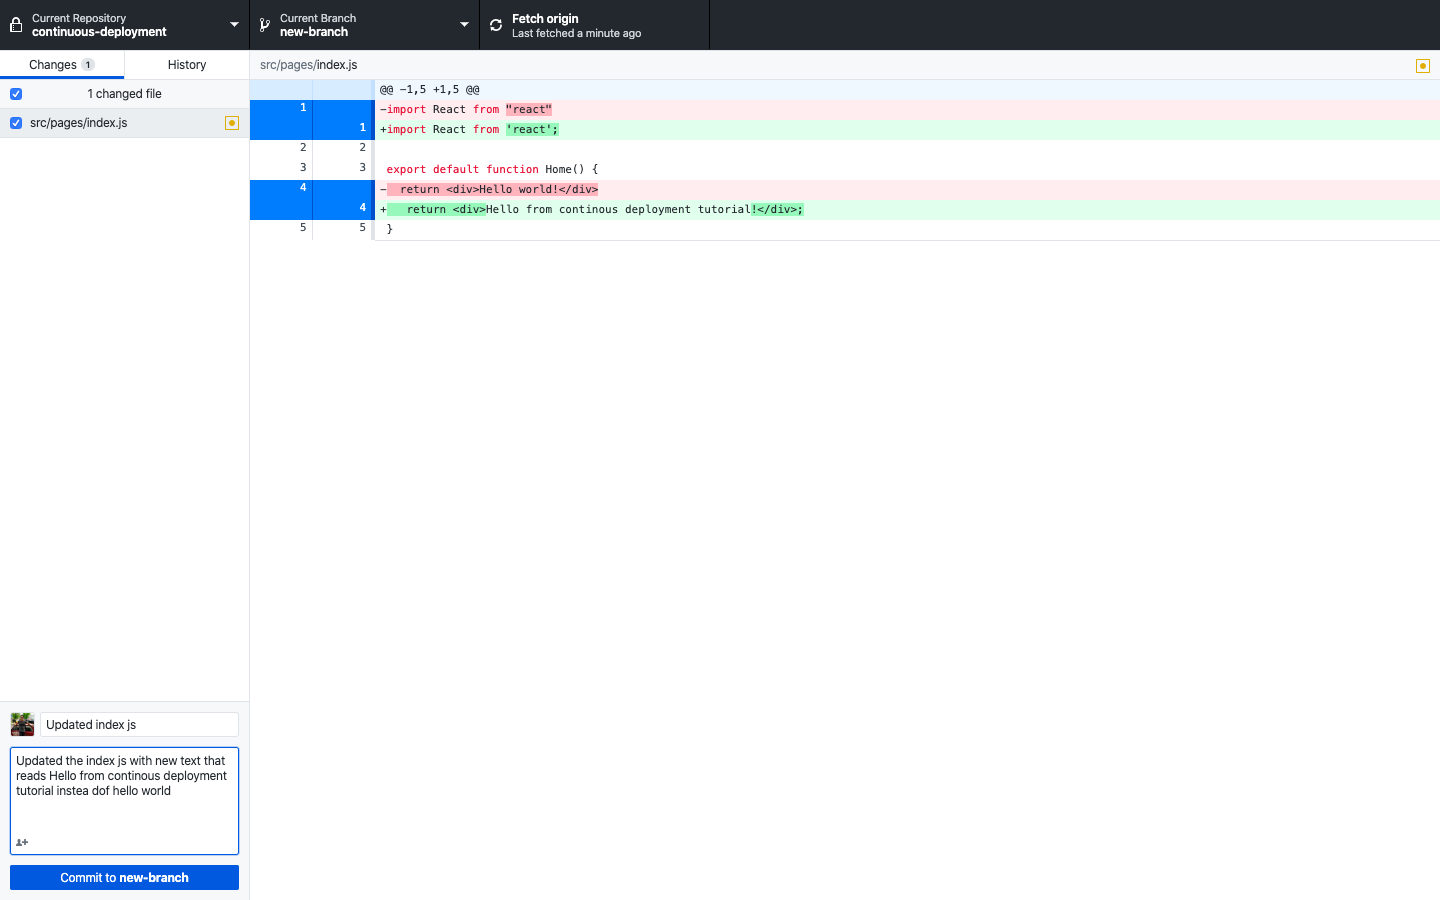
Just make sure that the commit message gives enough information on what changed in this branch. Doing this will help you or anyone who is going through your GitHub to understand what happened and where in case something goes wrong in the future.
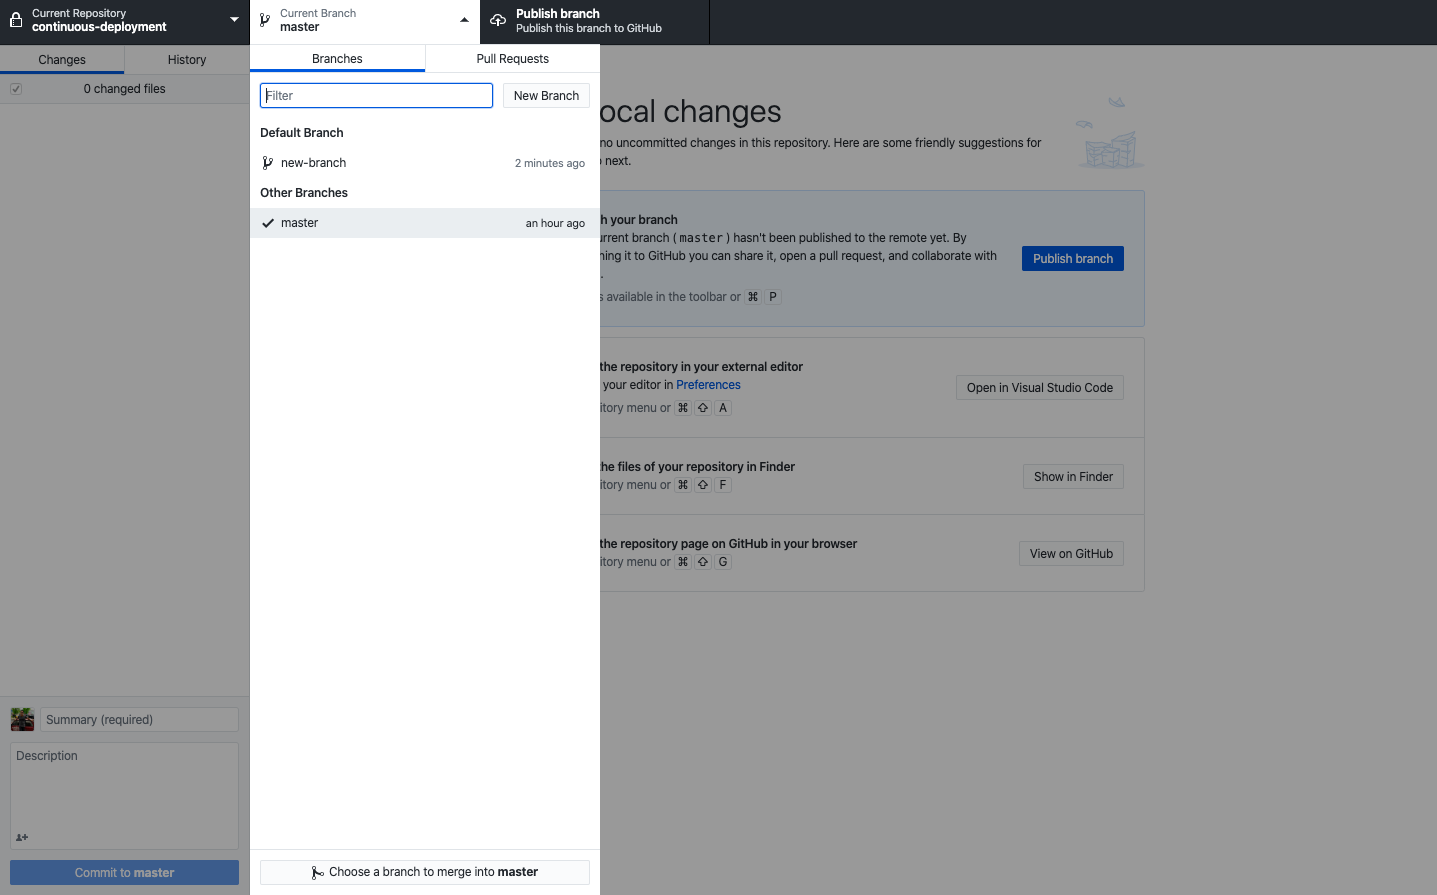
Once this is done, all that is left for us to do is merge this branch with the new feature to the master. We do that by clicking on the current branch tab in GitHub Desktop and selecting Master from it. Once this is done, you should click on the button that says Choose a branch to merge into Master.
All that is left to do now is to merge the new branch into the master, and you can do that by clicking on the blue button you see below.
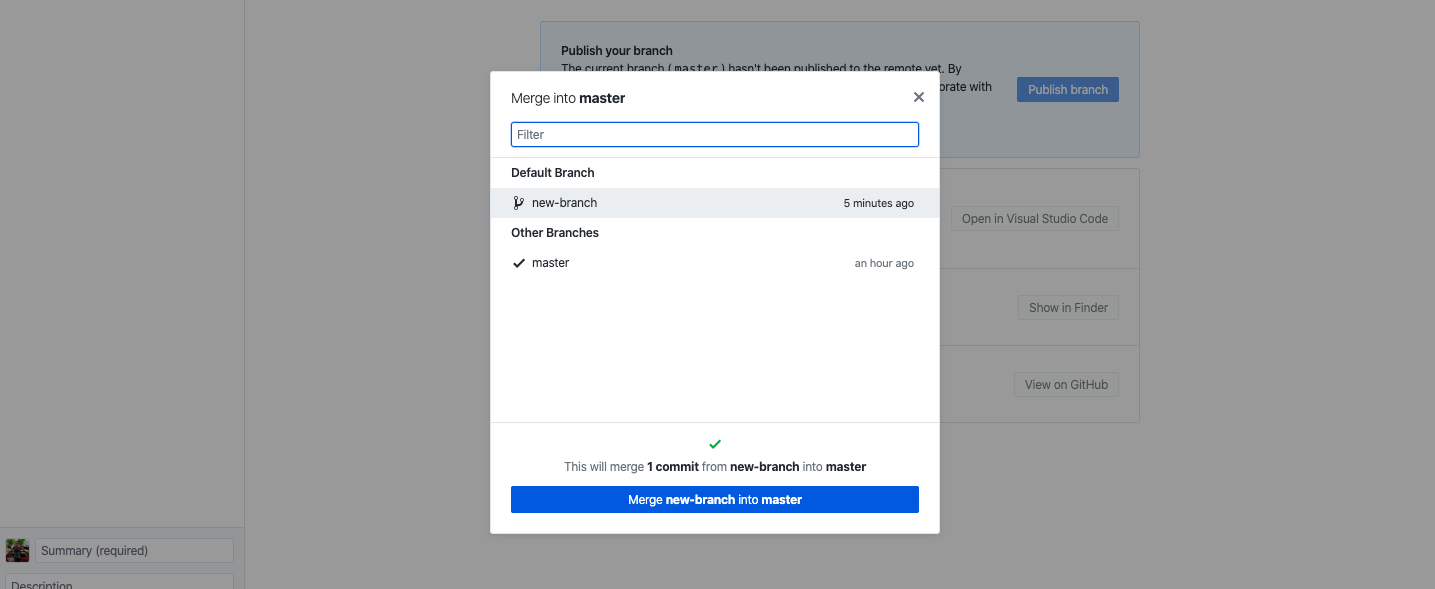
Once you have done this, your work here is done and GitHub and Netlify will take of everything else! 🎉 I say this as you merging the new branch into the Master branch triggered a new deployment in Netlify. So Netlify is now hard at work deploying your changes to master and will update the weird URL (the production) we saw earlier with the new feature you just merged into the master branch 💪
Summary
I like continuous deployment because it makes pushing new features to production very easy and maintainable. This is very important to me when working in sprints for a project as the clients need to be able to see new features at the end of time periods we set out for each sprint. This is all the more important if you happen to be working on a very large project that involves multiple functionalities and many developers.
If you found what you read on continuous deployment informative and helpful, please let me know and follow me on my social media channels for more! If not, you can just sign up to my email newsletter below to be notified of any blog post I publish 😊